Drupal is an awesome CMS (content management system), but it is so much more than just your ordinary blogposting system (though you can use Drupal for that as well). But the road to your own site (and perhaps internet success) must start somewhere, and if you want to set up a local environment on your computer to play around with Drupal (or any other PHP-driven system) you need a program or software to make this happen.
In this introductory screencast I show you how to download MAMP and install that on your Macintosh computer, followed by how you download and install Drupal (8, the latest version).
Download MAMP
MAMP is a bundle of programs, made especially for running a local server on your computer. This means that an installation of Drupal can run on your own computer, not accessible for other people, only for you. To make your webpage accessible for the whole world, you need to upload your files and database to a hosting company of some kind and get some kind of domain name and point that to your hosting companys server. But I'm getting ahead of myself. Back to MAMP.

You can find MAMP at https://www.mamp.info/. Download and install the software first of all. The downloaded file ends up in your Downloads folder by default. If you choose some other folder, remember where you put it... Or download it again (yes, we have all made that mistake at least one time.)
MAMP is freeware, but you can also buy MAMP Pro which is a more powerful solution if you want to handle or develop many sites simultaneously. Here, we will use the free version of MAMP for this introduction.
With MAMP you also get a program called Sequel Pro, which is a program that let's you connect and handle databases. More on that later on.
When the installation progress is finished, start the program and press "Start servers". When the on/off-icon turns green, your webserver is up and running. Good job!

Download Drupal
Next step is to download Drupal. Go to www.drupal.org and choose Download & Extend in the top menu on the page. The Download & Extend page is your first step to downloading Drupal, themes and modules (plugins to Drupal). Is this case we just want to download Drupal, so click the green button.

Next up, you get the choice to download different versions of Drupal, but we want the latest version. When we made this screencast the latest version was 8.0.0-rc1, but when you read/watch this, you should just choose the latest version of Drupal, which begins with and 8 (for example: 8.0.0, 8.0.1, 8.1.x etc and so on).

The download file (.tar.gz och .zip) ends up in your Downloads-folder (see above). Doubleclick it to extract the files.
Get ALL the files, not just the ones you see
This is a bit tricky. To make Drupal work, you need all the files you've just extracted. The problem is that some of the files are hidden, and by default Macintosh computers don't show hidden files. There are programs that let you see hidden files, but you can also make the magic happen by writing a simple command in the Terminal program.
Click your Spotlight magnifying glass-icon on your computer or open up a Spotlight search via your keyboard (most likely cmd+space) and type in Terminal.

Terminal is a terminal emulator included in the OS X operating system by Apple (Wikipedia), and from that you can list files, create folders etc. In short, you can do almost anything you can to in i Finder window - but more. And to make hidden files be visible you open up a terminal windows and type
defaults write com.apple.finder AppleShowAllFiles YES
Press Enter and on the next line, write
killall Finder
This sound horrifying, but it's ok, it doesn't kill something you're attached to (your kitten, your parents or your favourite snack or slippers). It just restarts the Finder application on Mac.
By now, if you open the folder the the extracted Drupal files are located in, you should see some files that are halfway see-through. These are the hidden files. Not to hidden now, ey?!

Good. Now on to the next step of fun and glory!
Choose the web docs folder
We need to place the Drupal files in a folder that MAMP can use. If you swich to your MAMP window and press Preferences you can see four tabs: Start/Stop, Ports, PHP and Web server. Click the Web server tab.

Here you can see where MAMP will look for the files to execute (run) Drupal. You can choose a completely different folder if you want, but I recommend you to use the folder MAMP suggests which is: Your harddrive > Application > MAMP > htdocs

If you click the round icon with an arrow you open up a Finder window that shows the content of the folder we want to use.
Let's move all the files
Now that we can see all the files, even the hidden ones, we can choose all the files and either drag'n'drop them in the htdocs-folder we just opened.
Choose the Drupalfiles and press cmd+C if you want to copy the files, or drag the files and the folders to the htdocs folder. If you chose to copy and paste the files, just click somewhere in the htdocs window and press cmd+V to paste the copied files into that folder.
It should end up looking something like this:

Create a database
You also need a database for Drupal to work. The database is where your content is stored, at least the text you enter as a blog post or story on your website. (Files you upload doesn't end up in the database, they are stored on the computer's hard drive.)
To create a database you can use a program called Sequel Pro, that ships with MAMP. Open up the MAMP applications folder or start Sequel Pro via your Spotlight.

Create a connection to the database by entering this information in this way:

By default MAMP has set both the Username and Password to root. You also need to enter the port, which in MAMPs case is 8889. You can find this information under the tab named Ports, under MAMP Preferences.

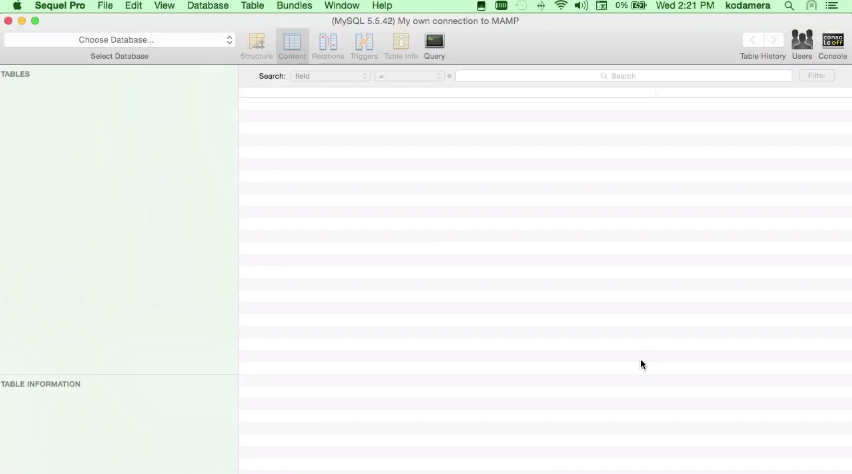
Back to Sequel Pro and press the blue button named Connect. If you have entered everything correct you will get connected to the database server. You should see a rather blank window like this.
Choose Database in the menu and then Add database.

Choose a name that's easy to remember, for example drupal.
Choose UTF-8 Unicode (utf8) as Database Encoding.
End this strange thing by clicking the button named Add.
"Are we there yet?"
Yes, yes we are. The next step is actually to start the installation of Drupal. Switch to your web browser and enter http://localhost:8888. This instructs MAMP to search the htdocs folder (where you have placed the Drupal files) and see what's there. MAMP will find Drupal's index.php that instructs Drupal to start an installation since we haven't don't that yet.
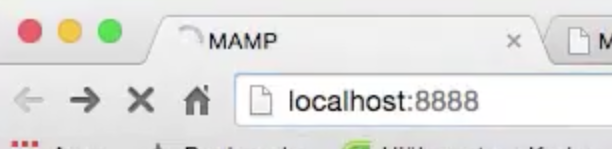
http://localhost:8888 will result in this webpage:

If you want some other language than English, you can choose this at this start screen. Language files will automatically load from Drupal's servers and set the default language to whatever you choose.
Press Save and continue.
Installations profiles
Drupal can use installation profiles to make different settings to you system. In this screencast we will only use the standard one, so just click Save and continue during this phase. We will cover installation profiles in a later screencast.
Database configuration
Now it's time to tell Drupal where to find the database. The only things we need are the name of the database, the database username and password. We have all that so lets type them in.

Database name: drupal (we entered that when we created the database earlier)
Database username: root (MAMP default)
Database password: root (MAMP default)
Click Save and continue.
Time to configure your site
When you have entered the database credentials the installation starts. This will take a minute or so depending on how fast your computer is. It could also take up top 5-10 minutes if you have an older computer.
During the installation process Drupal enables all the different parts of Drupal (modules) and sets up the system to make it work. We will cover the different parts in upcoming screencasts.
When you see this

the installation process is almost finished and it is now time to create your admin account and set the title of your website.
Choose some classy and nice information for the following fields:
Site name
Site email address
Username (this will be the first user account, the user/1 account, the head honcho, the big kahuna... you get the picure)
Password (password for the big kahuna account, see above)
Email address (for the big kahuna account, see above)
Default county
Default time zone
You can also check for updates automatically. This will instruct Drupal to scan to see if there has are any new versions of Drupal and the modules you have downloaded and enabled.

Good to know, but not vital if you are just playing around on your local computer. When you go live with your site, you should really see to it to keep your installation updated and secure.
That's it!
You are done. Drupal is installed and you can begin your Columbus-like journey through the menues and structure of Drupal. In the left part of the website you have the option to create content. Choose to create an Article for example and see what happens. We will make more screencasts on Drupal to make you discover more of Drupal. Check us out on Twitter, our RSS feed or YouTube channel to get continuous updates.
Take care!